A driver is halfway through the walk-around in a Suffolk yard when the defect appears. One trailer lamp stays dark, an air line hisses near the coupling, or a tyre shows fresh damage that wasn't visible on the previous return. The load is booked for Felixstowe, the A14 is already busy, and departure is only minutes away. Finding that fault in the yard is inconvenient. Finding it after a brake warning, tyre failure or coupling problem on the A14 is far worse.
This trailer inspection checklist is written for UK HGV fleet operators, transport managers, haulage and logistics businesses, trailer operators and HGV owner-drivers. It follows the trailer's working cycle, from pre-trip preparation through coupling and loading, the route itself, post-trip reporting and scheduled planned maintenance. The ten checks cover braking, tyres, lighting, suspension, coupling, structure, underrun protection, load restraint, doors and wheel-end condition.
A driver can identify obvious defects, leaks, damage, missing equipment and changes from the trailer's normal condition. A competent workshop must assess faults involving brake performance, air systems, wheel bearings, structural damage, coupling wear or any defect where roadworthiness isn't clear. DVSA guidance makes the distinction practical. Operators need daily walkaround checks and safety inspections, with each trailer in use checked as part of the combination. Good records support roadworthiness control, insurance discussions such as this guide to truck trailer insurance, MOT preparation and planned repairs.
Table of Contents
- 1. Brake System and Air Line Integrity
- 2. Tyre Condition and Tread Depth Compliance
- 3. Lights, Reflectors and Electrical Connections
- 4. Suspension, Springs and Shock Absorbers
- 5. Coupling and Fifth Wheel Security
- 6. Chassis Frame and Structural Integrity
- 7. Mud Flaps, Underrun Protection and Spray Suppression
- 8. Cargo Securing Points and Load Restraint Systems
- 9. Doors, Hinges, Latches and Tailgate Seals
- 10. Bearings, Wheel Hubs and Axle Condition
- 10-Point Trailer Inspection Comparison
- Turn the Checklist Into a Maintenance Record
1. Brake System and Air Line Integrity
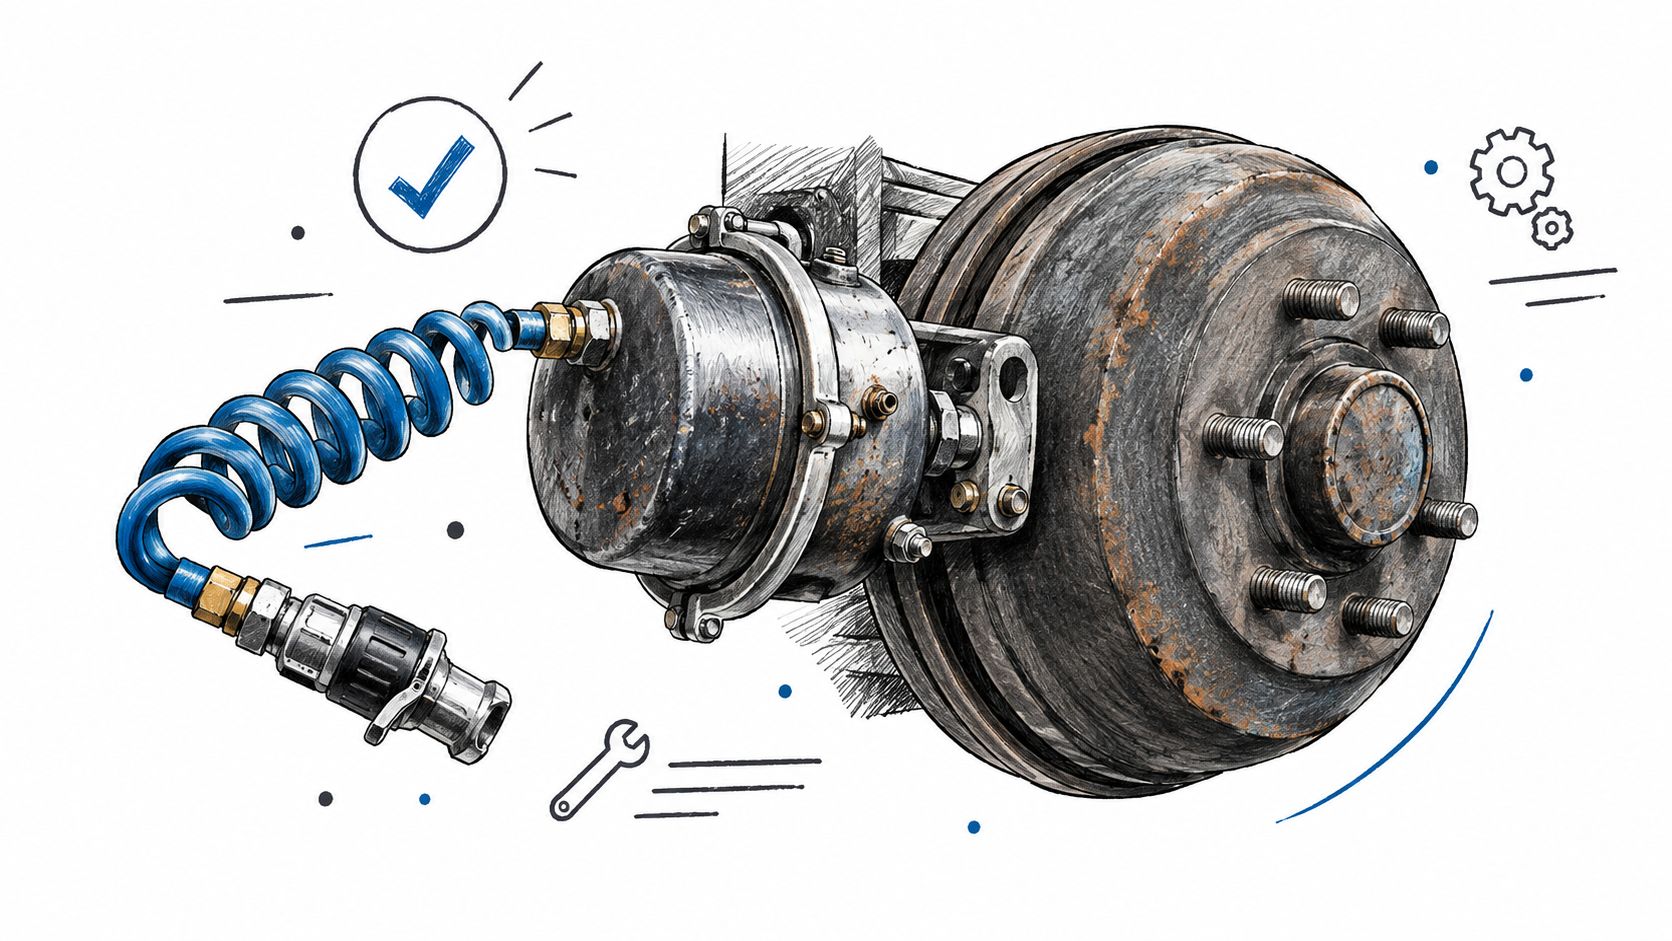
Brakes deserve more than a glance at the drums or discs. A proper check follows the system from the towing unit and air-line connections through the trailer's chambers, valves, hoses and friction components. The driver should listen for escaping air, inspect hoses for rubbing, cuts, corrosion or loose fittings, and confirm that the connections sit correctly before the trailer leaves the yard.
A leak may be obvious in a quiet yard, but small leaks can become harder to identify once the tractor is running. Wet conditions can help expose pinhole leaks through bubbling or a change in the sound of escaping air, although any suspected leak still needs a competent assessment. Moisture in the air system, damaged hose ends and poor coupling alignment can accelerate wear and affect brake response.
A visual walk-around doesn't prove that the trailer produces balanced braking force. DVSA expects a brake performance assessment at every safety inspection, with at least 4 meaningful laden assessments each year, as set out in the small-trailer safety inspection example published by DVSA. The brake-test evidence should show more than whether components look intact. It should help identify efficiency, imbalance, lag and problems that only appear when the trailer is working under load.
Workshop decision: A driver can report a hissing line or warning indication. A workshop should investigate pressure loss, brake adjustment, chamber condition and coupling interfaces, then confirm performance with a suitable test.
For operators around Woolpit, Elmswell, Bury St Edmunds, Stowmarket, Ipswich and Felixstowe, trailer roller brake testing in Suffolk can form part of planned fleet safety work. DVSA guidance says a trailer should be loaded for a brake test, ideally to at least 65% of its total maximum weight. The load should be positioned correctly, the drawing vehicle should be suitable, and the test conditions should be recorded. Planned testing is usually easier to manage than waiting for a brake defect to stop a vehicle on a route.
2. Tyre Condition and Tread Depth Compliance
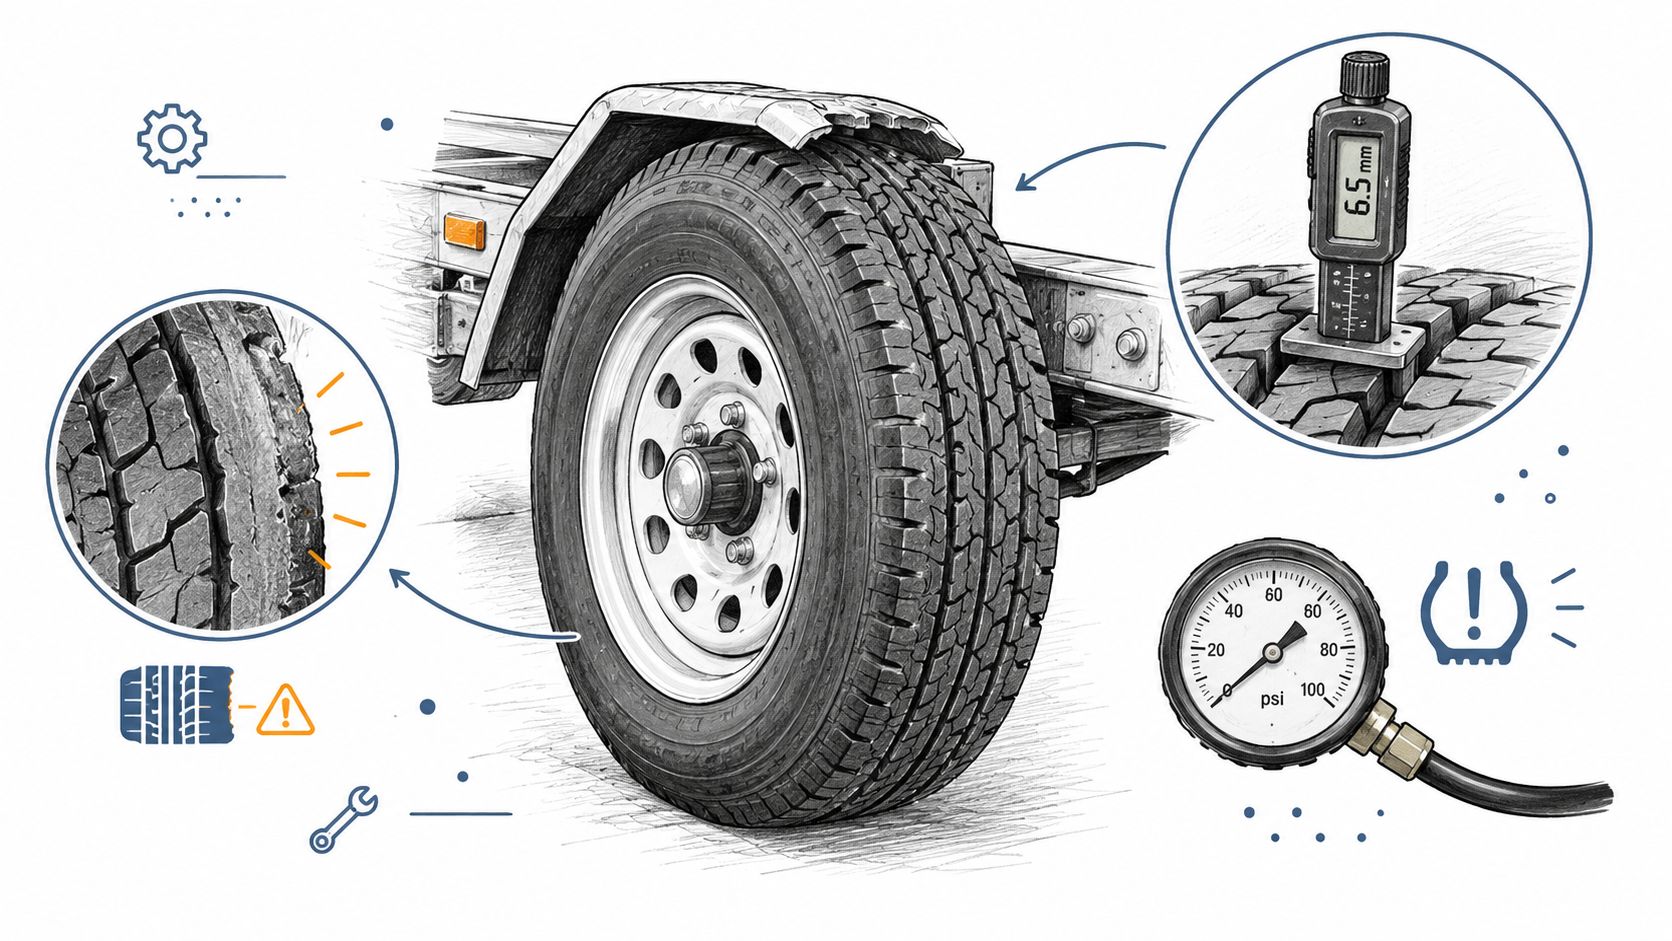
Before leaving the yard, inspect every trailer tyre, including the inner faces that are easy to miss. Check sidewalls, tread blocks, valve areas, rims and embedded objects. Even wear across an axle usually points to a different maintenance picture from shoulder wear, cupping, flat spotting or one tyre running hotter than its neighbour.
Use a tread-depth gauge for an objective reading, then complete the visual check. Look for cuts, bulges, exposed structure, impact marks and abnormal wear. Check pressures with the tyres cold, because operating heat changes the reading. For replacement planning and service intervals, use this trailer tyre replacement guidance.
During coupling and loading, consider the trailer's recent work. Repeated kerb strikes, hard braking and low-speed manoeuvring around distribution yards can damage casings, rims and suspension components. That pattern also reflects the wider risk of worn tyres, covered in this guide on how to escape a fine for worn tyres. A trailer running between Ipswich, Felixstowe and other yards should have tyre changes booked into maintenance windows, rather than waiting for a casing failure to cause roadside recovery.
Record each change against the trailer and wheel position. Include the reason for removal, tread or pressure findings, the wear pattern and any related defect corrected at the same time. These records help identify recurring alignment, suspension or loading faults, support DVSA and MOT preparation, and show whether the remedy worked.
A tyre with a serious defect can turn a planned workshop visit into unplanned recovery. Use a calibrated gauge and record defects clearly instead of relying on appearance.
Escalate these findings before the trailer returns to service:
- Sidewall damage: Bulges, deep cuts, exposed cords or impact marks require specialist assessment.
- Uneven wear: Cupping, shoulder wear or one hot tyre can indicate axle, suspension, alignment or brake faults.
- Pressure loss: Repeated loss may indicate a puncture, valve, rim or casing problem, not a routine top-up.
- Wheel damage: Cracks, distortion, loose fasteners or overheating signs require inspection before use.
On the route, any pressure warning, vibration, pulling or change in handling should be reported promptly and the trailer stopped safely for assessment. Do not attempt a roadside repair that only masks the defect. A workshop should investigate recurring wear, damaged casings, wheel condition and related running gear, then confirm the trailer is ready for work.
3. Lights, Reflectors and Electrical Connections
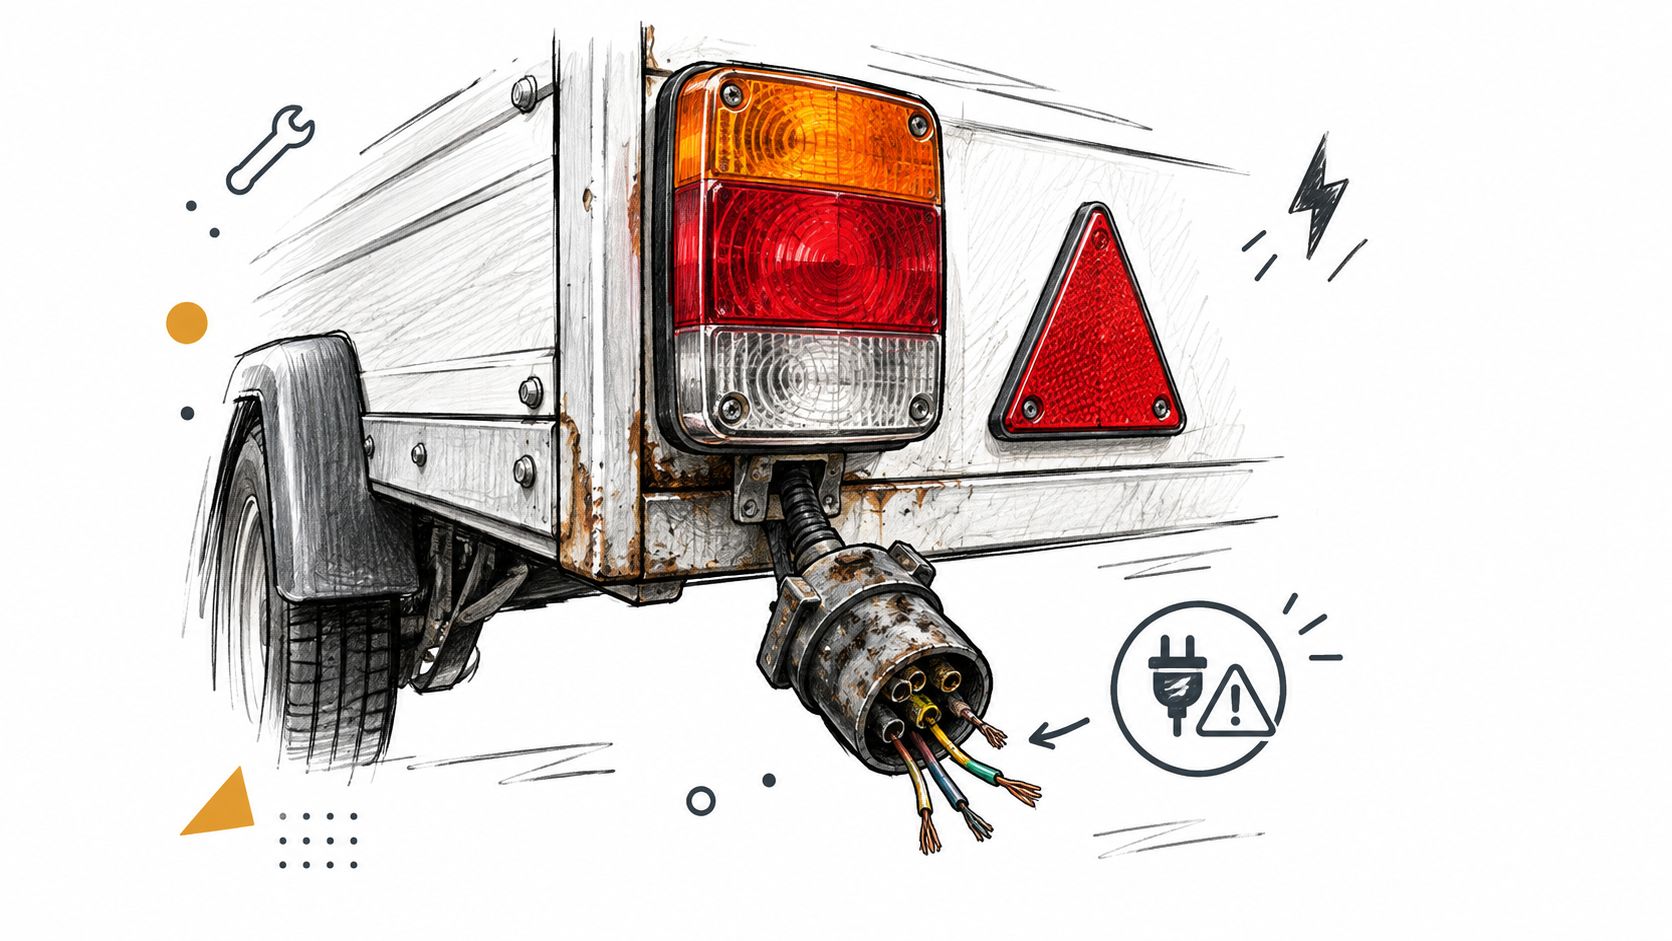
Lighting defects often appear during the first walk-around because they need only a powered tractor, a short circuit check and a second pair of eyes. Brake lamps, rear lamps, indicators, side markers, reflectors and conspicuity markings all contribute to the trailer being seen and understood by other road users, especially during dark, wet or foggy journeys.
The electrical connection should be checked at the same time. A corroded plug, loose socket, damaged loom or poor earth can create an intermittent fault that disappears when the trailer is stationary and reappears over bumps. Testing the lights with the trailer coupled to a powered towing unit is more useful than looking at bulbs in isolation, because it checks the complete connection.
A trailer leaving Woolpit for the A14 may be visible in daylight, but the risk changes during an evening return from Felixstowe or a wet run on the A12. Dirt, salt and moisture can obscure reflectors and damage connectors. Cleaning is part of inspection, not cosmetic preparation.
What the driver can see
The driver can identify a dark lamp, damaged lens, missing reflector, loose cable or exposed wiring. The driver can also report whether the fault is constant or intermittent, which helps the workshop trace poor connections. A lamp that works only after the cable is moved shouldn't be treated as fixed.
- Test under operating conditions: Switch through all trailer functions with the tractor connected.
- Inspect the loom: Look for chafing, crushed sections, exposed conductors and unsupported cable runs.
- Clean contact areas: Remove contamination before deciding that a lamp or connector has failed.
- Record repeated faults: Recurring lighting defects can indicate water ingress, vibration damage or a poor earth.
DVSA's roadworthiness approach treats lighting as part of a structured inspection, not a casual glance. If the trailer is being prepared for an MOT, lighting repairs should be completed and rechecked before presentation. Woolpit Truck Repairs can support HGV and trailer inspections, electrical diagnostics, repairs and MOT preparation without presenting itself as an MOT test station.
4. Suspension, Springs and Shock Absorbers
A trailer that sits differently from the rest of the fleet is giving useful information. A low corner, altered ride height, leaning body or new gap around an air suspension component can point to a spring, bellows, valve, bush or mounting problem. The driver may notice the change during the walk-around, while a workshop needs to establish whether the fault affects load distribution, braking geometry or axle alignment.
Suspension components take repeated shocks from potholes, loading ramps, yard surfaces and hard braking. Leaf springs can crack or shift, dampers can lose effectiveness, and bushes or pivot points can develop play. On an air-suspended trailer, a leak may leave one side lower and put additional stress on tyres and the chassis.
The route matters. A trailer moving frequently through port yards around Felixstowe sees a different combination of tight turns, dock impacts and salt exposure from a unit used mainly on smooth trunk roads. That doesn't create a different standard of roadworthiness, but it does change where maintenance teams should look first and how quickly a small defect may become a service interruption.
A driver should report a new clunk, rattle, lean or ride-height change as a defect, not as a normal trailer characteristic.
During a planned inspection, the technician can compare suspension condition across axles and examine mounting brackets, air lines, bellows, springs, hangers and bushes. The record should note the symptom and operating context, such as a noise after a pothole strike or a low corner after loading. That detail helps avoid replacing a visible part while leaving the underlying cause unresolved.
A trailer with damaged suspension may still move around a yard, but that doesn't make it suitable for a loaded motorway journey. If the fault affects stability, tyre contact, coupling height or brake-line routing, the trailer should be isolated until the assessment is complete.
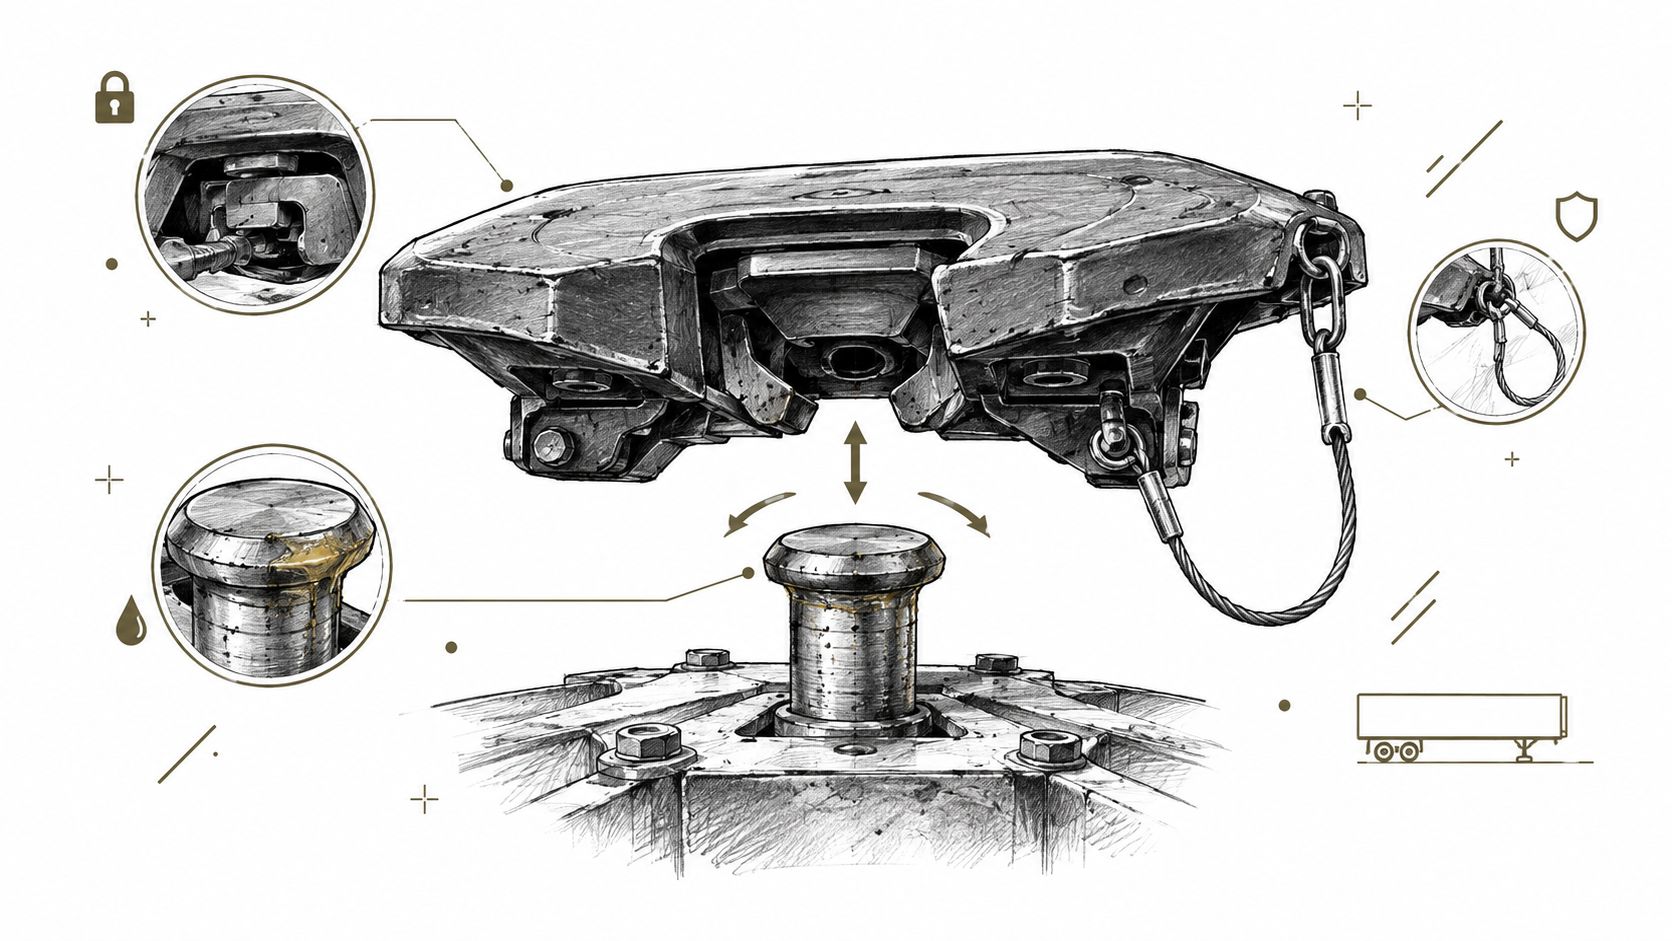
5. Coupling and Fifth Wheel Security
Coupling checks begin before the tractor reverses under the trailer. The kingpin, coupling plate, jaws, release mechanism, drawbar eye or tow coupling, air connections, electrical connection and safety equipment all need to be considered as one working interface. A trailer isn't secure because the jaws appear closed. The operator needs to confirm correct engagement and investigate any abnormal movement or noise.
The driver can inspect for obvious damage, check that the locking indication is correct, complete the required tug or pull check and confirm that the landing gear is raised and secured. The driver should also check that air lines and electrical leads aren't stretched, trapped or rubbing against moving parts. Missing or damaged safety equipment is a stop-and-report issue.
Play in the coupling may be felt as a knock when reversing or moving away. It may arise from wear at the kingpin, coupling jaws, plate or associated mounting, and it isn't safe to diagnose by listening alone. A workshop assessment is needed where there is excessive movement, uneven wear, damaged locking hardware or uncertainty about engagement.
Coupling evidence belongs in the maintenance file
DVSA's HGV inspection material includes vehicle-to-trailer coupling, trailer parking brake, air-line connections, tyres, wheels and hubs as specific inspection points. The example record also captures the vehicle or trailer identity, VIN, odometer, date, location and defect rectification status in a way that makes the inspection traceable. Operators should use that level of detail when a coupling defect is found, rather than writing only “coupling checked”.
- Before coupling: Examine the kingpin, plate and locking area for damage, contamination or abnormal wear.
- After coupling: Confirm engagement, air supply, electrical function, landing-gear position and clearance.
- Before loading: Check that the combination sits correctly and that coupling components haven't shifted.
- After a strike: Isolate the trailer after a dock impact, harsh reverse or suspected contact until the coupling and chassis are examined.
Planned PMI support gives the workshop an opportunity to assess wear before it becomes a departure failure. This is particularly useful for mixed fleets where trailers move between drivers and depots and no single operator sees every coupling event.
6. Chassis Frame and Structural Integrity
Structural defects don't always announce themselves with a loud noise. A crack near a weld, a buckled cross-member, corrosion around a mounting point or impact damage under the body can remain unnoticed until the trailer is loaded and the frame is placed under greater stress. The inspection should use good lighting and include the underside, corners, cross-members, suspension mounts, kingpin area and visible load-bearing members.
Port and coastal work deserves close attention to corrosion. Salt and moisture can attack fasteners, weld areas and concealed sections, while repeated dock contact can bend or distort components without leaving obvious external damage. A trailer operating between Felixstowe, Ipswich and wider East Anglia should have damage history recorded, especially after a yard impact or rough loading event.
The driver can report visible cracks, fresh bends, holes, hanging components and changes in body alignment. The driver shouldn't tap welds as a substitute for a competent structural examination, grind corrosion away, apply treatment over a crack or decide that a defect is acceptable because the body still carries an empty load.
Signs that need escalation
- Cracks near welds: Pay attention to corners, cross-member joints and mounting areas.
- Buckled members: A bent rail or distorted support can change how forces travel through the trailer.
- Deep corrosion: Rust holes, flaking sections and weakened fasteners need professional assessment.
- Impact history: A trailer can require inspection after a collision or dock strike even when paint damage looks minor.
Structural work should be planned around the trailer's condition and use. A workshop can identify whether the issue needs cleaning and treatment, component repair, welding, replacement or withdrawal from service. Repeatedly covering a visible defect without confirming the remaining strength creates poor records and increases the risk of a later failure.
7. Mud Flaps, Underrun Protection and Spray Suppression
Mud flaps and spray suppression equipment are easy to overlook because they sit low and often become dirty during normal work. That position is exactly why they need checking. Tears, missing sections, loose brackets and blocked or damaged spray equipment can reduce visibility for following traffic and create an avoidable roadworthiness defect.
Underrun protection needs a separate inspection. Rear and side protection devices must be secure, correctly positioned and free from damage that affects their purpose. A bent bar after a reversing incident can look usable while no longer providing the intended protection. Corrosion around brackets and fasteners is another concern on trailers working in coastal areas.
The driver can see missing guards, loose fixings, serious bends and torn flaps. Measuring dimensions, assessing mounting strength and deciding whether a damaged underrun device remains compliant belong with a competent person. A quick visual pass should trigger a workshop assessment where the bar is distorted, the mounts are cracked or the trailer has suffered impact damage.
Low-mounted equipment collects the evidence of a hard-working trailer. Dirt can hide cracks, and a damaged guard can remain unnoticed until the next enforcement or MOT preparation check.
A practical yard check should include the following:
- Rear protection: Confirm the bar is present, secure and not visibly bent or detached.
- Side protection: Check rails, brackets and fixings for impact damage and corrosion.
- Mud flaps: Look for tears, missing sections, loose hangers and contact with tyres.
- Spray equipment: Clear dirt and report damaged or ineffective components before wet-weather work.
- Recent incidents: Link any damage to the job or route that caused it, so repeated yard problems can be addressed.
Planned trailer inspections and repair support can deal with guards, fixings and body fittings before a minor defect delays a loaded departure.
8. Cargo Securing Points and Load Restraint Systems
A trailer can pass an empty walk-around and still be unsafe once loaded. Lashing rings, anchor points, side stakes, load bars, curtains, roof rails and other restraint equipment must be inspected for secure attachment and damage before cargo is placed against them. The load plan must also match the trailer's condition and the restraint equipment available.
The driver and loading team should look for bent rings, cracked brackets, loose bolts, distorted stakes, damaged straps and corrosion around attachment points. A heavy or uneven load can expose a weakness that wasn't visible during an empty inspection. After emergency braking, harsh cornering or a load shift, the trailer should be stopped safely and the restraint system rechecked before continuing.
Operators using the A14 corridor into Felixstowe and Ipswich need a clear handover between loading staff, drivers and maintenance. The record should identify the trailer, the load context and any damaged securing point. Photographs can help show condition before a high-value load leaves, but a photograph doesn't replace a physical check or a competent repair.
What changes after loading
- Check attachment points: Confirm rings, rails and stakes are secure before tension is applied.
- Check restraint equipment: Remove damaged straps, chains, bars or fittings from service.
- Check distribution: Keep the load balanced and avoid placing excessive force through one area.
- Recheck after movement: Inspect after a major stop, harsh braking event or report of shifting cargo.
- Close the defect: A damaged securing point needs a repair decision before the trailer is released for another load.
A driver can identify visible damage and report load movement. A workshop should assess cracked metalwork, failed mounts, distorted rails and repairs affecting the trailer structure. Load-retention defects should never be cleared by tightening a strap around a component that has already lost its strength.
9. Doors, Hinges, Latches and Tailgate Seals
Doors protect the load and form part of the trailer's security. Rear doors, side doors, roll-up doors, curtains, tailgates, hinges, locks, handles, seals and frames all need to close correctly without excessive force or visible gaps. A door that latches but doesn't sit square may open under vibration or admit water and dust.
The check should happen both empty and after loading where access allows. A damaged frame may become obvious only when the load is positioned, while a worn seal can be overlooked until cargo arrives wet or contaminated. Refrigerated and temperature-sensitive operations need particular care because a poor seal can undermine the trailer's ability to protect its load.
Coastal work around Felixstowe can accelerate corrosion on hinges, fasteners and latch components. A stiff hinge, rattling handle or door that needs lifting to close is an early warning, not a harmless nuisance. Greasing a hinge may help movement, but it won't correct a bent frame, worn latch or damaged mounting.
The commercial body fittings service information is relevant where the defect involves doors, latches, hinges, seals or related trailer body equipment. Woolpit Truck Repairs can assess and repair commercial trailer fittings as part of wider inspection and maintenance support.
- Inspect seals: Look for splits, flattening, gaps and areas where the seal has pulled away.
- Test latches: Confirm the mechanism closes securely without excessive movement.
- Check hinges: Report stiffness, corrosion, lift, rattling or visible distortion.
- Inspect after impact: A door may close while the frame or mounting remains damaged.
- Record load sensitivity: Note whether the defect affects weather protection, temperature control or cargo security.
10. Bearings, Wheel Hubs and Axle Condition
Wheel-end checks combine what can be seen, heard and felt with evidence from the trailer's operating history. Hub seals should be checked for visible leakage, wheels should be inspected for damage, and the axle area should be examined for corrosion, cracks, distortion and signs of overheating. A driver may also notice grinding, rumbling, vibration or a wheel that feels hotter than others after a route.
A hot hub or unusual smell after motorway running deserves attention. Bearing damage can create friction, heat and play, while seal failure can allow lubrication to escape. An axle that is bent or out of alignment may show up first as uneven tyre wear, but the tyre symptom shouldn't be treated without investigating the axle and wheel-end condition.
The driver shouldn't jack up a wheel, adjust bearing play or rely on hand movement as a final diagnosis unless the operator's procedure and competence specifically allow it. Wheel-end work carries serious safety implications and needs the right equipment and assessment. If a trailer has a grinding noise, repeated hub heat, fluid weep, wheel movement or a history of impact, it should be referred to a commercial vehicle workshop.
Route observations that matter
- Heat comparison: Report one hub or wheel-end noticeably hotter than the others after a comparable journey.
- Noise change: Note whether the sound appears under load, during cornering or at a particular speed.
- Tyre evidence: Link uneven wear to possible axle, bearing, suspension or alignment problems.
- Leak evidence: Treat grease or oil around the hub as a defect requiring investigation.
- Return-to-service decision: Don't release the trailer until the cause has been assessed and the repair outcome recorded.
The HGV inspection record approach supports this level of traceability. A workshop outcome should state what was found, what was repaired or adjusted, who completed the work and whether the trailer was returned to service.
10-Point Trailer Inspection Comparison
Component Implementation complexity Resource requirements Expected outcomes Ideal use cases Key advantages Brake System and Air Line Integrity High, specialist testing and dynamic checks Roller brake tester, air tools, trained technicians, replacement chambers/hoses Reliable braking, leak detection, MOT compliance Fleet safety audits, high-speed motorway operations, pre-MOT checks Prevents catastrophic brake failures; objective stopping-force data Tyre Condition and Tread Depth Compliance Low, straightforward measurements Calibrated tread gauge, pressure gauge, tyre changing/balancing equipment Legal tread compliance, improved grip and fuel economy Routine pre-trip checks, port/logistics, high-mileage fleets Low-cost, quick detection; extends tyre life and supports audits Lights, Reflectors and Electrical Connections Low–Medium, functional testing and diagnostics Tow vehicle power, multimeter/diagnostics, spare bulbs/connectors Restored visibility, avoids MOT failure and enforcement Night driving, coastal routes, pre-journey electrical checks Quick, inexpensive repairs; significantly improves road visibility Suspension, Springs and Shock Absorbers Medium–High, detailed inspection and alignment Lifts, spring/air suspension tools, replacement springs/dampers Stable handling, even tyre wear, load security Heavy-load routes, rough roads, scheduled maintenance Prevents progressive component failure; improves ride and safety Coupling and Fifth Wheel Security Medium, precise checks and geometry verification Measuring gauges, coupling grease, specialist replacement parts Secure coupling, correct geometry, reduced separation risk Articulated trailers, frequent coupling/uncoupling operations Prevents separation/jackknife; critical for operator liability reduction Chassis Frame and Structural Integrity Medium–High, visual + possible structural repair Inspection tools, welding/straightening equipment, NDT if needed Prevents structural failure, maintains load-bearing capacity Older trailers, post-impact checks, coastal/port operations Extends asset life; prevents catastrophic frame collapse Mud Flaps, Underrun Protection and Spray Suppression Low, visual and simple repair/replace Basic hand tools, replacement flaps/bars, measuring tape Compliance with underrun rules, reduced spray and underrun risk Wet-weather routes, urban and coastal areas, regulatory inspections Inexpensive to replace; high safety and environmental benefit Cargo Securing Points and Load Restraint Systems Low–Medium, visual and load-capacity checks Fasteners, welding/repair capability, possible certification Prevents load shift/spillage, meets enforcement standards Heavy or irregular cargo, port logistics, high-value loads Reduces load-related accidents; supports insurance and compliance Doors, Hinges, Latches and Tailgate Seals Low–Medium, functional and seal integrity checks Lubricants, replacement seals/hinges, minor panel tools Cargo protection, weatherproofing, secure closure (reefer integrity) Refrigerated transport, frequent loading/unloading, coastal routes Prevents contamination/spillage; maintains cargo temperature/control Bearings, Wheel Hubs and Axle Condition Medium–High, removal and detailed bearing work Lifts, bearing tools, seals, hub/axle replacement parts Prevents seizure, ensures wheel rotation and axle integrity High-mileage fleets, long-distance motorway hauls Prevents wheel lockup/fires; essential for safe, reliable operationTurn the Checklist Into a Maintenance Record
A checklist only protects uptime when it changes what happens next. The pre-trip inspection should be completed before the trailer leaves the yard, with the driver recording the trailer identity, visible condition and any defect that could affect safe use. The coupling and loading stage then adds confirmation that the combination is correctly connected and that the load restraint equipment is suitable and secure.
During the route, the driver should treat new symptoms as new evidence. A warning light, air hiss, hot hub, dragging component, shifted load, damaged lamp or door problem can develop after the yard inspection. A safe stop and clear report can prevent a small defect from becoming a recovery job between Ipswich and Felixstowe or on the A14 near Woolpit.
The post-trip check closes the operational loop. It records damage, unusual noise, tyre condition, hub heat, body damage and missing equipment while the journey is still fresh. That record gives the maintenance team a starting point before the next driver receives the trailer.
A useful defect record
Each report should contain enough information for a workshop to act without chasing the original driver for basic facts.
- Trailer identity: Record the trailer number or other fleet identifier, and include the VIN where the inspection record requires it.
- Date and context: Note the inspection date, location, mileage or operating context, such as port work, loading, a pothole strike or a long motorway run.
- Defect description: State what was seen, heard or felt. “Nearside hub hot after route” is more useful than “wheel problem”.
- Immediate action: Record whether the trailer was isolated, unloaded, repaired temporarily or referred for assessment.
- Workshop outcome: Capture the diagnosis, repair, test result and any parts or adjustments completed.
- Return to service: Confirm who authorised the trailer to return and whether further monitoring or planned work is required.
DVSA's Guide to Maintaining Roadworthiness sets the framework for daily walkaround checks and safety inspections. It also makes clear that the full vehicle or combination needs consideration, and that every trailer being used on a multi-trailer operation must be checked. The record should therefore identify the actual trailer inspected, not just the tractor or route.
A safety-critical defect should take the trailer out of service until a competent assessment and repair decision are complete. Repeatedly resetting a warning, tightening a loose fitting without finding the cause or returning a trailer because the next job is urgent creates a weak maintenance trail. Recurring faults need escalation, diagnostics or a deeper inspection.
Brake evidence deserves its own planned routine. DVSA's guidance on understanding a trailer brake-test report explains why a laden test produces more meaningful evidence than a basic visual check. The best-practice approach also requires the roller brake test to be carried out with the vehicle aligned, at full air pressure and with the brakes applied progressively, using calibrated equipment, as described in industry brake-test guidance. Operators unable to arrange laden testing need documented risk assessment and alternative evidence where appropriate, rather than an undocumented assumption that an empty test is enough.
A structured maintenance file helps transport managers see patterns across the fleet. It can show repeated tyre wear on one trailer, recurring lighting faults after coastal work, coupling wear linked to certain tractors or brake imbalance before an MOT presentation. Woolpit Truck Repairs supports HGV and trailer safety inspections, PMI planning, roller brake testing, diagnostics, mechanical repairs, tyre support and MOT preparation and presentation support. The workshop is based near Woolpit, Elmswell and A14 Junction 47, serving operators around Bury St Edmunds, Stowmarket, Ipswich, Felixstowe, Suffolk, Essex and Norfolk. Callouts and recovery are subject to availability.
Contact Woolpit Truck Repairs to arrange HGV or trailer inspections, planned maintenance, roller brake testing, diagnostics, repairs, tyre support or MOT preparation and presentation support. Visit Woolpit Truck Repairs to discuss a trailer defect, upcoming PMI requirement or callout and recovery need, subject to availability.